"Science is a way of investigating, understanding and explaining our natural world, physical world and wider universe" (NZ Curriculum).

Students need to lean what science is and how scientists work as well as scientific knowledge.

Science programmes at Eastern Hutt aim to provide hands on investigations that will develop students' curiosity of the world around us and an interest in science.

Sunday, June 8, 2014

The Great Candle Experiment

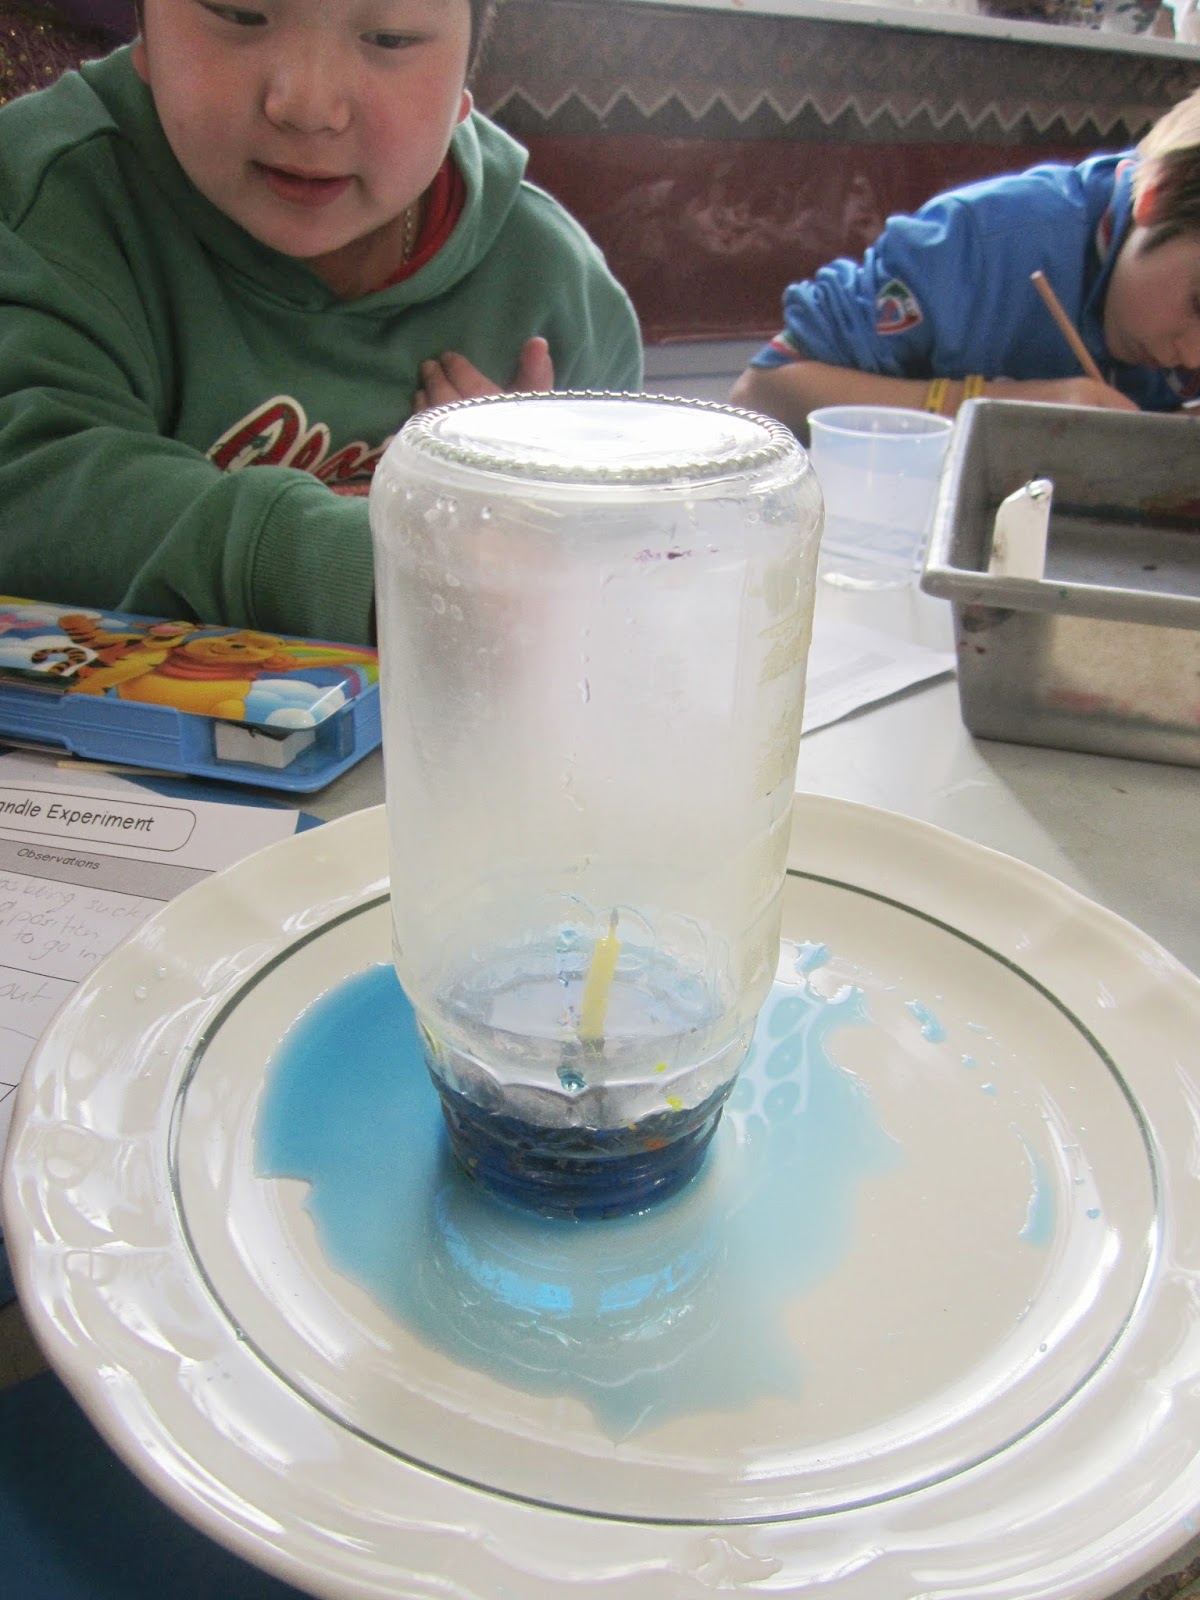
This experiment is often done and is always a lot of fun.  During this science lesson it promoted a lot of discussion about what we thought was happening.

What to do:
  1. Stick a candle onto a plate with plasticine.
  2. Pour some coloured water onto the plate.
  3. Light the candle.
  4. Carefully lower a jar over the top.
  5. Observe what happens.
What we observed:
  • The water was slowly sucked into the jar.
  • The candle slowly went out.
  • When the candle went out the smoke went straight up.
  • When the candle went out lots of water was quickly sucked up into the jar.
  • There were some bubbles around the jar as the water was sucked in.
Carefully lower the jar over the candle.

What can you see happening?

This small candle burnt for a long time.

Wow - lots of the water has been sucked up into the jar.

This little candle worked the best.


We could see some bubbles around the jar.
Click on this link to find out why this happens.

Friday, May 23, 2014

Extinguishing a Candle

For a flame to burn it needs 3 things:
  • Oxygen
  • Fuel
  • Heat
This is called the Fire Triangle. If you remove one of these things the flame will be extinguished.

This week the science club students investigated what would happen if they put a jar upside down over a candle. They predicted that the flame would go out because all the oxygen would get used up.

The students had to observe the flame carefully to ensure it had gone out before they lifted off the jar. Sometimes the flame was not out and when the jar was lifted oxygen got to the candle and the flame got bigger.

Then they used a range of jar sizes to see if this made a difference to the time the flame burnt for.
After 1 test they found out that the candle in the small jar extinguished before the candle in the large jar. However, they decided to do more testing just in case this was a coincidence.

After more trials they found out that every time the candles in the smaller jars were extinguished the quickest.

Why does this happen? Everyone decided that it was because the biggest jar had the most oxygen inside it so the flame could burn for longer. As the candle burnt it used up the oxygen and gave out carbon dioxide. The carbon dioxide would also help to extinguish the flame. 


They also  found out that there are many changes that occur when a candle burns.

So what is produced when a candle burns?
  • You sometimes get smoke and soot (which is particles of partly burnt wax)
  • The wax changes into melted wax.
  • Carbon Dioxide and Water are produced from the chemical reaction between the oxygen and the fuel in the flame.

Tuesday, May 20, 2014

Science Club 2014

Yay!  The Year 5 and 6 Science Club has started again for 2014.  The theme of our learning this term is burning and heat.

The first lesson was about candles and what makes them burn.

Here is our equipment for the lesson.

To keep safe we had some water handy.  Just in case!

First we had to carefully observe the candle and take notes about it before we lit it.

We recorded our observations carefully.

Does the candle have a smell?

Next we lit the candle and observed changes to the candle.

After predicting what we thought would happen we recorded what we observed.

We started thinking about how and why a candle burns.


We think that the wick burns first and this melts the wax.  The liquid wax wicks (moves up) the wick and the gas formed from the wax floats around the wick.  The gas is what is burning.

We also think the hottest part of the flame is around the wick and the blue part at the bottom.

Around the flame we could see a faint haze.

Tune in next week to find out what else we find out about burning.

Saturday, June 29, 2013

Here is the challenge that the Science Club was  given today.

We cut up the ransom note to test it using chromatography.   To do this we dropped a small amount of water onto the pen to see what would happen.  We noticed that each pen produced a different pattern when the ink spread out in the water.

Next we tested each of the suspects pens by drawing with them and then putting a drop of water on top.

Finally we compared the suspects pens to the ransom note to determine which pen wrote the note.
Two pens were very similar but most of us got it right.


Friday, June 7, 2013

A Mysterious White Powder

Help - A mysterious white powder has arrived in a letter.  It could be dangerous.  We need a forensic scientist to find out what it is.

This was the challenge that the science club kids had today.  They were given 6 different powders and had to do 3 tests to find out what they were.

 
The tests were:
  • Iodine Test  - This tests to see if the substance has starch in it.  If there is starch it will go black.
  • Vinegar Test  - This tests to see if the substance is a base.  If it is a base it will fizz.
  • Indicator Paper Test  - This tests to see if the substance is an acid, base or neutral.  If it was an acid the paper goes red.  If it was a base the paper goes green/blue.  If it was neutral there was no colour change.
It's fizzing up with the vinegar!
The substance has changed colour when I added the iodine.  It must be starch.

We used a flowchart to determine what the substance was and recorded our results carefully.


We had to record our evidence very carefully.
 Luckily the forensic scientists identified all the powders correctly (and none of them were dangerous)!


Saturday, May 18, 2013

Science is Real and Science Rocks at EHS

Last week Eastern Hutt School celebrated Science Week.  Take a look at all the amazing science we got up to.


Friday, May 17, 2013

Crime Scene Science - Fingerprinting

Josh - Today we learnt how to identify fingerprints from different people and ourselves.

Ashni - Today we learnt how to use different skills to identify peoples fingerprints.

Yasmine- We displayed our fingerprints and named each feature.

Ethan - It was interesting when we went around the room to try and identify each persons fingerprints.  This was really hard.

Ashwini - Today we learnt how to be like a forensic scientist and we learnt how to show our fingerprints.  Fingerprints have different patterns.  At the end we had a guessing game and had to work out whose finger print we had.  It was very hard.


Claire - Today at Science Club we had to show many different science skills and try to recognize each others fingerprints.

Rohan - Today I learnt that being a Forensic Scientist is really hard work.  You need to keep on trying when something doesn't work.  You can't give up.

Selena - Did you know there are so many different types of fingerprints?


Matt F - There are different fingerprint types and I had an accidental pattern on my thumb.

Matt B - We learnt how to be Forensic Scientists and study fingerprints.  We tried to take latent fingerprints with baby powder but this was really hard.

Louis - Today we learnt about how to be Forensic Scientists and how to study fingerprints.  We learnt that there are 7 different types of fingerprint patterns.  Mine were mostly central pocket loops.  Who knew there were so many different fingerprint patterns?


Max - Today we studied fingerprints and we played a guessing game to see if we could figure out whose fingerprint we had received.  Instead I used the handwriting on the paper and matched it up to the writing on their fingerprint sheet. (Very clever!)